For Switzerland please access mapset using the address:
https://editor.mapset.ch/
For other countries please use the international domain:
https://editor.mapset.io/

Usage and Copyright
You can use many of mapset's functions for test purposes without registering. However you may only use map material generated without registration for your personal purposes. Without registration, it is not permitted to publish mapset plan material. In particular, it is not permitted to use maps from mapset for traveller information and for public information in general without registration.
In addition, whenever maps from mapset are used, the copyright notices for the map data, which are always displayed at the bottom of the map in mapset, must be displayed in a clearly legible manner.
Login
Several features are restricted to registered users and can only be accessed when logged in, e.g.:
- Export plans as an image
- Save and share plans via permalink
- Save and access plans with custom names
- Routing Tool
Sign in is possible with an existing third party account or an individual account in our system. After your company or your individual address has been registered you may create an account via the Sign up link in the login page.
For registration please contact us.

Stop Finder
The Stop Finder allows to navigate to a specific stop. Typing into the input field will automatically suggest matching stops.
When selecting an item from the list of suggested stops, the map will pan to the newly selected station.
In addition to the name, the search also understands the official abbreviations and numbers of stops. E.g. 'Bern' can be found by either typing 'Bern', 'BN' or '8507000'.

Layer Toggler
The Layers dialog allows to customize the basemap by toggling the visibility of specific layers. In addition to the default background, also a satellite map can be selected.
Some layers are only visible on specific zoom levels, therefore toggling a layer may not have immediate visual impact. If this is the case, zoom in/out to see the toggle effect.
Furthermore, it is possible to filter for individual features in some layers. An example are the bus lines in Switzerland. When selecting this layer in the Layers-Popup you are presented with a filter to search for buses by the name of the operator (e.g. 'PAG') and the number of the line (e.g. 'B 111').
Drawing tools

Draw icon
Individual icons
This tool is used to place icons on the map.
Icons can be styled using the popup when an icon is selected. Several icon categories make a wide variety of icons available to be drawn on the map. The rotation and the size of the icon can be set individually.
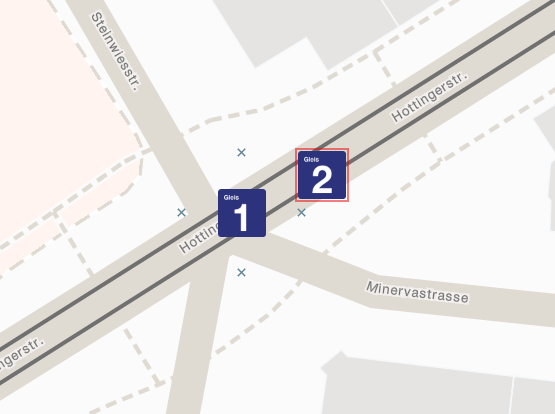
Grouping icons
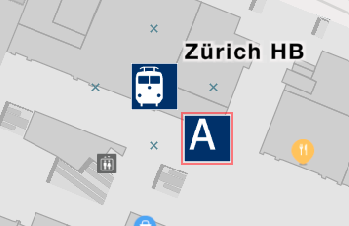
Multiple icons can be selected by holding the Ctrl key while click selecting an icon.
This feature is especially useful to prevent aligned icons from overlapping on different zoom levels.
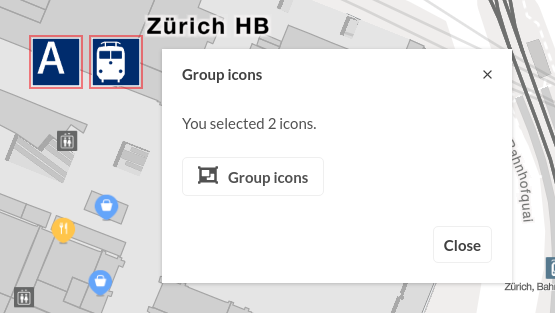
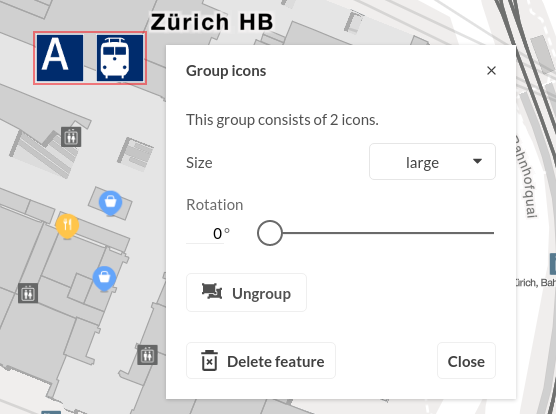
Once multiple icons are selected a popup for grouping icons will open, allowing the user to group various icons into a single one. Icon grouping can subsequently be reversed by selecting the grouped icon and clicking on the Ungroup button in the popup.

Draw line
This tool is used to draw lines on the map.
When the tool is active, there are two ways to draw lines.
In standard mode, each click creates another node for the line. Double-clicking on the map completes the line and exits the drawing mode.
In freehand mode, curves can be created by pressing the Shift key and dragging the left mouse button over the map. If the Shift key is pressed in addition to the Ctrl key, the curves are also smoothed.
When editing an existing line, nodes can be added by dragging it.
Existing nodes can be modified by dragging them and removed by simply clicking on them.
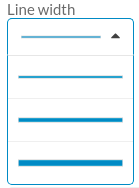
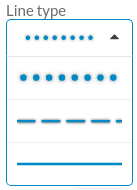
The line style can be customized using the popup when a line is selected:
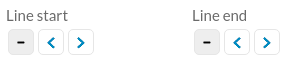
Arrows can be added at line start/end
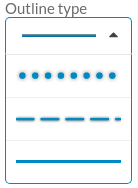
The line width and type can be set using predefined options
Preset colors are available in the color selector
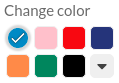
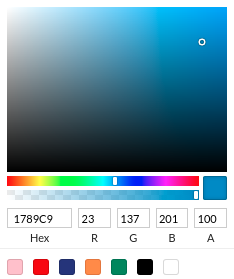
Custom color can be applied using a color picker when clicking the caret button in the color selector.
The color can be set by standard pointer selection, via Hex code or via RGBA code.
The opacity of the line is defined by the 'A' value, between 0 and 100.

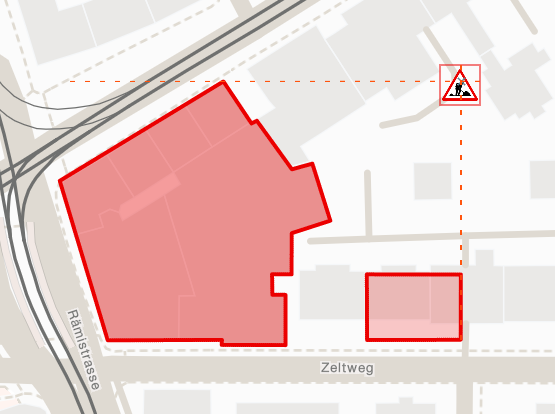
Draw area
This tool is used to draw polygons on the map.
When the tool is active, there are two ways to draw polygons.
In standard mode, each click on the map creates another node. Double-clicking on the map closes the polygon and exits the drawing mode.
In freehand mode, polygons with curved outlines can be created by pressing the Shift key and dragging the left mouse button over the map.
When editing an existing area, nodes can be added by dragging the polygon outline.
Existing nodes can be modified by dragging them. They can be removed by first selecting and then clicking them again.
The polygon style can be customized using the popup when a polygon is selected:
Color selectors can be used to style the polygon outline and surface
Preset colors are available in the color selectors
Custom color can be applied using a color picker when clicking the caret button in the color selector.
The color can be set by standard pointer selection, via Hex code or via RGBA code.
The opacity of the line is defined by the 'A' value, between 0 and 100.
The outline width and type can be set using predefined options
A selection of fill patterns can be applied to the polygon surface area
The transparency of the polygon surface area can be set using a slider


Draw label
This tool is used to place text labels on the map.
The text label is entered in a text field and can be multi-lined if required.
The label style can be customized using the popup when a label is selected:
By pressing on the B button the font can be set to bold

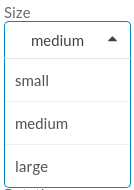
The font size can be set to one of the predefined options
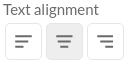
By default the text alignment is centered, but can be set to align left or right
The text and background color can be set using the predefined colors in the color selector or using the custom color widget.
The color can be set by standard pointer selection, or via Hex code or RGBA code.
The opacity of the line is defined by the 'A' value, between 0 and 100.
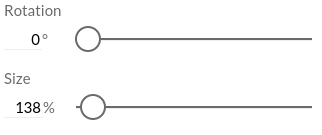
The text can be rotated using a degree input, either by moving the slider thumb or by entering a rotation value in the number input field (0° - 360°)


Insert picture
You must be logged in to use this feature.
Access to this feature depends on user rights and Corporate Design settings.
This tool is used to place images on the map. In contrast to icons, pictures scale with the map zoom level.
A selection of pictures is available for placement on the map.
The image can be rotated using a degree input, either by moving the slider thumb or by entering a rotation value in the number input field (0° - 360°).
The same input allows the resizing of the picture between 50 and 4000%. 100% represents the approximated size of the corresponding real-world object.

Draw route
You must be logged in to use this feature.
This tool is used to automatically create routes between given points for a selection of modes of transport (MOT).
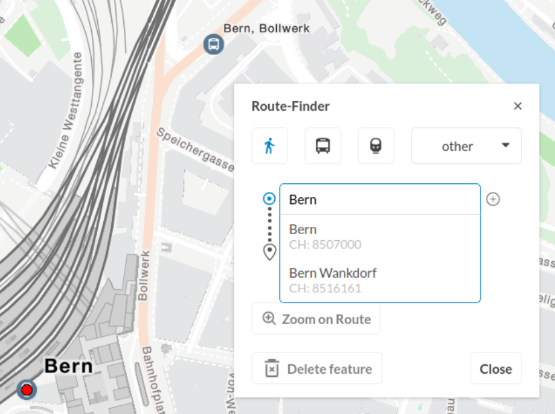
When the Route-Finder popup opens first select an MOT. The main MOTs (foot, train, bus) have dedicated buttons, while several other MOT can be selected from a dropdown menu. Switching between MOTs will always clear the current route and start a new one.

There are two ways of defining route stops in mapset:
Text input: Use the text input fields to search for stations. When changing the input text a list of suggestions will appear under the field, from which a target station can be selected either via click or using the arrow and enter keys from the keyboard. The station search is handled the same way as in the Stop Finder.
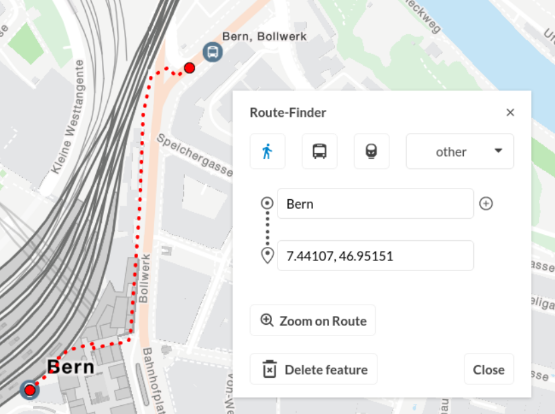
Map click: Stops can also be defined by clicking on the map. While the Route-Finder is active, clicking on the map will add a new point at the end of the current route and show the coordinate in the text input field. Note that when a text input field is focused (highlighted blue), clicking on the map will update the corresponding stop with the new coordinates instead of adding one.
The current route can be edited by adding, updating or removing way points:
Add: Clicking on the map will automatically add a new stop with the current coordinate at the end of the route.
Alternatively, a new field can be added by using the Add stop button to the right of the input field. This creates an empty input field at the subsequent input field index, where a new stop can be defined as described previously.

Edit: Stops can be updated by redefining them using the input fields as described previously, either by typing in new text and selecting a station from the suggestions or by highlighting a field by clicking it first and then clicking on the map to adjust the coordinate.
Furthermore, the sequence of stops can be updated via drag and drop. To the left of the input fields a small handle (three dots) appears on hover, which can be clicked and dragged, triggering the field to unhinge from the current fields. It then can be dropped at a new field position.

When dropping the stop item at a new position, the fields in the popup as well as the route on the map is updated.
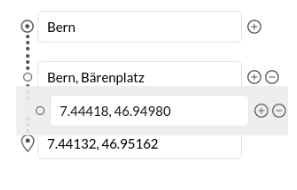
Delete: All stops apart from the start and end stops can be removed by clicking the Remove stop button to the very right of the input field.

Alternatively, any stop can be removed by fully deleting the text input from the input field via the keyboard.
Clicking the Zoom on route-Buttonfits the current map extent to the route dimensions.
The map can be centered on any of the stops by clicking the stop marker icon left of the input fields in the popup.

The current route can be deleted by clicking the Delete Feature-Button
Note that once the Route-Finder popup is closed the route will be converted into a line feature and stops cannot be edited anymore. Instead, the route can now be modified and styled as described in the Draw line section.
Limit to zoom levels
The range slider for the Zoom-Limits can be used to limit a feature's visibility to certain zoom levels. This allows the user to adapt plan content according to the current zoom level.
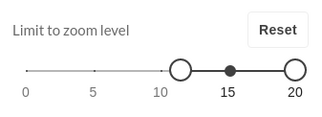
The white slider thumbs can be used to adjust the zoom range at which the feature is visible. The black dot on the slider shows the current zoom. Clicking the Reset-Button will remove all zoom limitations.
A button for activation of the Inspect Mode among the map control buttons enables the user to keep track of all the hidden features. Inspect Mode reveals all the features regardless of their current visibility.

Clicking on a currently hidden feature while Inspect Mode is active will zoom to the feature's visible zoom range and select it to be further edited.
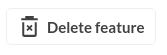
Delete feature
There are two ways to remove a feature from the map:
Select a feature and click the Delete feature button in the popup
Select a feature and press the Delete or Backspace key on the keyboard
Undo/Redo
Actions on the map are saved momentarily in the app history. The user can use it to undo/redo actions.
Changes to the plan can be undone by pressing Ctrl + z.
Reversed changes can be reapplied by pressing Ctrl + y or Ctrl + Shift + z.

Map Rotation
In mapset the map can be rotated by dragging it while pressing Alt + Shift. The current rotation is displayed in a button at the bottom right:

Clicking this button will reset the map rotation.
Alignment aid
mapset provides tools for positioning when drawing and editing map elements. There are two possible types of alignment:
Auxiliary lines: When drawing and editing feature nodes, auxiliary lines to neighbouring nodes are displayed, on which the new or repositioned node aligns itself. Thus, for example, pictograms can be lined up on a line or right angles can be drawn for lines and polygons.
Icon anchor points: Icons can be precisely aligned with a snap function to ensure even spacing between them. When drawing and editing icons, four anchor points are displayed around neighbouring icons on which the drawn pictogram aligns when in proximity. The spacing of the anchor points adjusts according to the size of the pictogram.
Snap points and auxiliary lines can be hidden on-the-fly by holding down the CTRL key. Alignment aids can be changed or switched on and off in the app settings.

Save plan
You must be logged in to use this feature.
In mapset, any change to the current plan is automatically saved. A notification in the header indicates that the current plan has been saved.
There are two ways to save and further edit plans in mapset:
- By means of a link to edit (see Plan sharing).
- By means of plan naming and plan list (see Plan names and plan list)
Plan names and list
You must be logged in to use this feature.
mapset plans can be given a name for an easier reference and a better overview of all created plans.
When a plan is not yet named, the text 'Untitled plan' appears in the header.

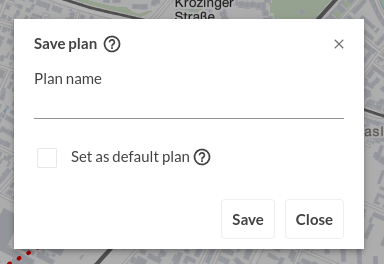
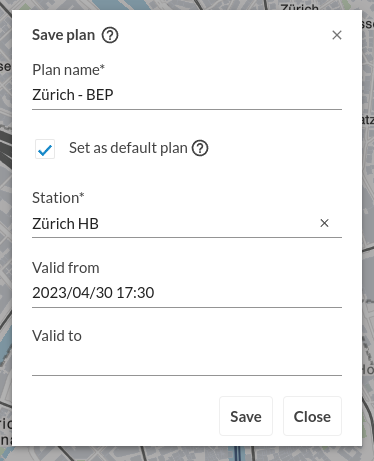
Click on this text to enter a new plan name. A load spinner and confirmation message next to the text input field indicates the plan name has been saved. Alternatively, the Save tool from the sidebar can be used to open a dialog window where the plan name can also be set or updated in a text input field.
Once a plan has a name it will be available in the plans list.
Named plans can be loaded into the map from the plans list by selecting a plan and clicking on the Open button.
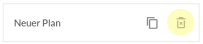
Plans can be deleted from the list using the corresponding Delete button.
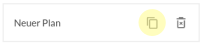
Clicking the Duplicate button will make a copy of the corresponding plan from the list.
Default plans
You must be logged in to use this feature.
Access to this feature depends on user rights and Corporate Design settings.
To use default plans, you need an additional module to your mapset subscription.
mapset plans can be defined as the default for a stop. Default plans can be loaded dynamically via a link, which at a minimum only contains the station ID and the abbreviation of your transport company. Optionally, validity periods can also be specified for a standard plan.
For the editing of default plans, we create special user groups for you in the mapset backend. This automatically enables several people with the appropriate rights to work on plans collaboratively.
When you load a default plan via the station ID, mapset checks whether there is already a manually created template for the station. If no template is found, mapset automatically displays the station on the base map. You can thus call up a plan for each station and only have to manually draw additions on the map for those stations that require it.
The following example illustrates how to retrieve a default plan:
- id: Station-ID (e.g. 8507000 for Bern)
- validity: a single date in ISO-8601 format on which the standard plan should be valid (e.g. 2023-04-26T16:05:16Z)
- tu: transport provider (e.g. ch.sbb)
The default plan URL then looks like this:
https://editor.mapset.ch/defaults?tu=ch.sbb&id=8507000&validity=2023-04-26T16:05:16Z

Plan sharing
You must be logged in to use this feature.
There are two types of links to share the plan:
Link to share
The Share link is used to share your plan with others in read-only mode or to embed the plan in other applications. This link renders the map with the plan, but doesn't show any of the mapset tools and thus doeesn't allow editing of the plan.
Link to edit
This Edit link is used to reopen and continue editing a previously created plan. You can use this link to collaborate on the same plan with other users.

Download plan
PNG & JPG
You must be logged in to use this feature.
Plans can be exported as images in PNG raster format. The download settings can be adjusted in the special pop-up dialogue box.
The export can be customised in advance in the export settings:
- A north arrow can be added in the bottom right corner of the exported image.
- By default, the complete map view is exported. Alternatively, a section of the map can be defined for export. To define the section, a red frame is displayed, which can be moved and resized. The size of the exported image is always displayed in pixels in the dialogue window and at the bottom right of the frame. The last defined section remains saved in the browser and is restored the next time mapset is started. This function allows you to create a series of maps with the same dimensions without having to adjust the frame each time.
The section can also be pinned to the map using the Lock section option, which scales and moves the frame when the map is zoomed and dragged. - By default, the image is exported with the resolution of your monitor. This resolution is suitable for embedding the image statically in websites or using it in a presentation, for example. If you want to print the image, the plan should be exported with a high or very high resolution. This means that plans can also be printed in high quality in sizes up to B1.
PDF Template
The plans can be integrated directly into a template via the export dialogue. This eliminates the need to subsequently insert jpg or png plan images into a layout in another programme.
The templates must be designed in advance and programmed by geOps. They are designed according to individual requirements and the respective corporate design. The templates are then available for selection in the export dialogue.
By default, the complete map view is exported in the corresponding aspect ratio of the template. Alternatively, a section of the map can be defined for export, again automatically in the correct aspect ratio for the template.
By default, the name of the map is used as the title. This can be customised.
A description can be added and formatted if required. To do this, select the text and choose the formatting function shown. Alternatively, you can also use a formatted text from a word processing programme.

New plan
The New plan button will open a new, blank plan.
Please ensure that you saved your current plan by name or store the edit link to be able to load and continue editing it later.
The Duplicate plan button will make a copy of the currently loaded plan and load it into the map.

Settings
Language
There are four available languages:
- German
- English
- French
- Italian
Corporate Design
You must be logged in to use this feature.
Predefined Corporate Designs can be set using a drop-down menu.

Access to specific Corporate Designs depends on the user's access rights.
Corporate Designs customize certain mapset features, such as:
- icon design
- default colors in the color selectors
- availability of custom icons
- access to the Draw image tool
Show tips at startup
Defines if short hints for an optimal usage of mapset are displayed at startup.
From the dialog for each hint you may deactivate the option to display further hints. In the settings dialog you may re-activate the display again.
Alignment aid
In this menu you can switch between different alignment aids or switch off the alignment aid completely. More information on the alignment aids can be found under Drawing tools.

Feedback
If you find errors in mapset or have suggestions for improvement, we will be happy to receive them. You can write a short description in the message field.
It helps us if you provide the message with a picture in which it is clearly visible how the situation would be correct. The best way to do this is to use a mapset plan (example).
We check all incoming messages and give you feedback on them.
Design guidelines
Our users at SBB and VBZ have provided the guidelines (Italian) linked here to ensure that plans are designed consistently and clearly. The guidelines are not binding and can be consulted on a voluntary basis to support the creation of plans.
Any questions?
Stay up to date!
We will inform you regularly about the latest mapset updates in our newsletter and on Twitter.